What is GFCI protection, and why do homeowners need to know about it?
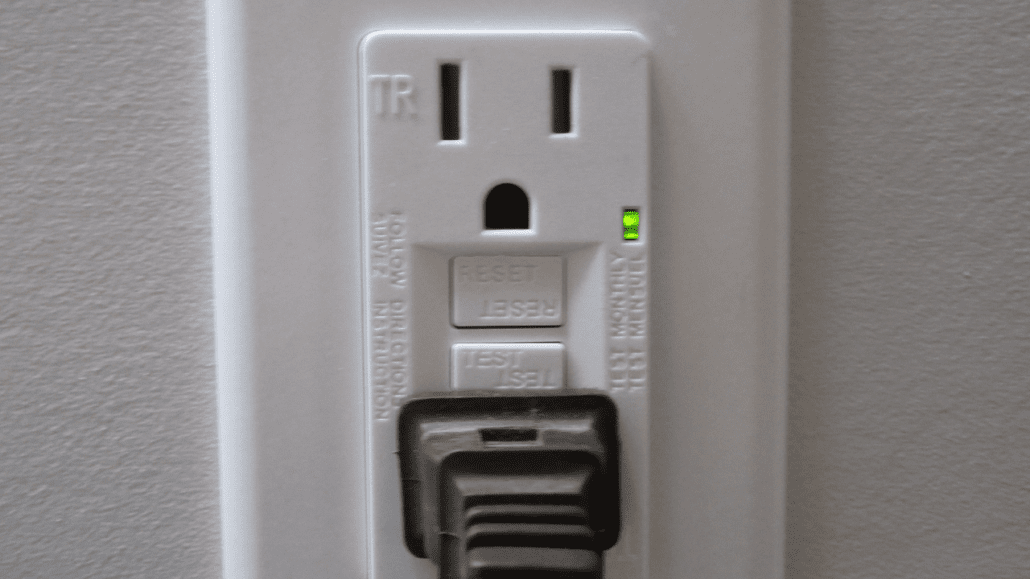
You’ll often know if your outlets have this protection from a simple glance. Nowadays, these features are commonplace, so you may not have given them a second thought. These outlets will usually have a “GFCI protected” sticker on them, or will have the Test and Reset button placed in between the outlet sockets.
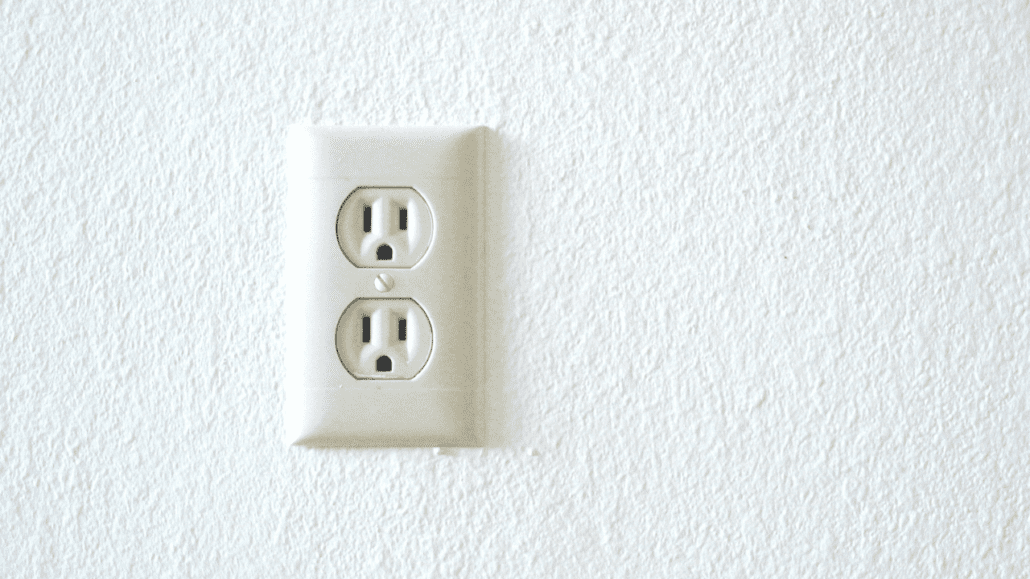
Look around your house right now. Do you notice any? How about outlets that don’t have this feature? If your outlets don’t have the buttons, that doesn’t necessarily mean you don’t have the protection.
Only the first outlet in the circuit needs it, and then all other outlets downstream will also be protected. Plus in some instances, a GFCI breaker may be installed in the panel, in lieu of being at the outlet.
GFCI protection has only been around a few decades, so if you live in an older home, you may find that most of your outlets don’t have these square buttons where we would expect them today. This poses a dangerous risk (which we’ll tell you about in just a sec), and you should consider an electrical upgrade as soon as possible.
Even if you do have updated outlets, it’s not uncommon for these protections to become faulty. This is why you should be testing them in your home every month.
But don’t scroll down just yet. If you need to know how to test a GFCI outlet, then it’s very important to understand what it is, why you need it, and yes— how it works.
RELATED: HOME INSPECTION CHECKLIST
What is GFCI Protection
GFCI stands for Ground Fault Circuit Interrupters. In simple terms, this is just fancy electrical protection that prevents you from being shocked. That’s why NEC (National Electrical Code) requires GFCI protection for every room at a home that is close to a water source.
As of 2021, many spaces now require GFCI protection. Back in 1971, only swimming pools and the exterior required GFCI protection. Bathrooms were added in 1975, and then garages in 1978. Hot tubs/spas were added to the list in 1981.
Later in 1987 kitchens, unfinished basements, spa bathtubs and boathouses were added. It used to be that only outlets within 6-feet of the kitchen sink needed GFCI protection, but that was later expanded to include outlets serving all countertop surfaces.
Outlets under the kitchen sink generally still do not need GFCI protection, however.
1990 saw the addition of crawlspaces and in 1993, wet bars were added. Things remain unchanged until 2005 when laundry outlets were added to the requirement.
Today, nearly all outlets near swimming pool areas, the exterior, kitchens, crawl spaces, garages, boathouses, basements, and laundry areas should be equipped with this protection.
Essentially, a ground fault circuit interrupters must be used for all of the following except:
- Fixed electric snow melting equipment
- Receptacles that are not readily accessible (such as under the kitchen sink, although we still recommend it).
- Some Receptacles tied to an outdoor dedicated branch circuit (e.g., a sump pump)
The NEC updates their requirements every three years. The electrical section of the Florida Building Code (FBC) is based on the NEC, so be mindful of that if you’re a homeowner.
Also, keep in mind that your local building department may have additional requirements. We always recommend checking with your local building department for the most current and accurate code information.
What Does It Do?
Have you ever been afraid of getting shocked while plugging in a hairdryer or maybe a toaster? GFCI protection directly addresses these concerns.
Pretty much what it can do is sense a change in electrical currents that prompts the outlet to switch off immediately. Maybe you have you’re reading your Kindle in the bathtub, but you have it charging in a nearby outlet. To save you from potentially shocking yourself should you drop it in the water, the GFCI will turn itself off in about 20-30 milliseconds.
125-volt, single-phase, 15- and 20-amp receptacles
What’s the Difference Between GFCI vs. GFI
Absolutely nothing. We sometimes use GFCI and GFI (ground fault interrupters) interchangeably, but they are the same device.
GFCI vs. AFCI
Arc Fault Circuit Interrupters (AFCI’s) are even more modern than GFCI. They came into homes around 1999, and they look similar to GFCIs, with the same test and reset buttons.
The main difference between these two is that GFCI’s protect you from an electrical shock, whereas AFCI protects your house from potential fires caused by arcing & sparking.
GFCI’s keep control of ground faults while AFCI interrupts “arcing faults” that usually come from bad wiring.
Ground faults can cause bodily harm, whereas bad wiring (such as arc faults) are responsible for starting more than 28,000 home fires, according to The Electrical Safety Foundation International (ESFI).
RELATED: WHAT TO EXPECT FROM YOUR HOME INSPECTION – BEFORE, DURING & AFTER
How To Install a GFCI Outlet

Can you install a GFCI outlet on your own? Most of the time— yes. If any of these outlets stop working in your home, it’s crucial to replace them right away.
Especially if the faulty outlet is in a wet location such as a bathroom or kitchen. But if you have any doubts or discomfort working with electricity, an electrician really should perform this work.
Here’s a quick breakdown of how to install a GFCI outlet:
Step 1: Turn off the circuit breaker.
Step 2: Remove the outlet cover and the switch with a screwdriver (Pro-Tip: test the outlet with an electrical outlet testing tool to make sure it is completely off and no currents are flowing through the wires)
Step 3: Disconnect the “hot wire” with (right side, black wire, brass screw)
Step 4: Disconnect the neutral wire (left side, white wire, silver screw)
Step 5: Disconnect the grounding wire (green or tan insulation and screw)
Step 6: Replace the outlet with GFCI, making sure to follow the instructions on the package and use the appropriate screws for each wire.
If you have fewer than 2 wires or more than 3 in your old outlet, call an electrician as these outlets will require a few extra steps.
RELATED: FLORIDA HOME MAINTENANCE CHECKLIST
GFCI Protection Cost
A standard GFCI outlet costs anywhere from $15 to $50 at your local hardware store. You’ll need to know the amp and voltage of each outlet you are replacing before going the DIY route.
Ground-fault circuit interrupters absolutely need to be installed by an electrician when there is anything more or less than three wires. We also don’t recommend installing these yourself if you have little home improvement experience (there’s still the risk of being shocked, after all!).
If you hire an electrician for your GFCI protection, the average cost to replace a single outlet with a licensed professional is about $120 per receptacle.
RELATED: OVERLOOKED BASICS OF CARBON MONOXIDE AND SMOKE DETECTOR ALARMS
How To Test GFCI Outlet
You should be testing your GFCI protection outlet every single month.
Here’s how it’s done:
Step 1: Plug a lamp, phone charger, or some other small electrical device into your outlet
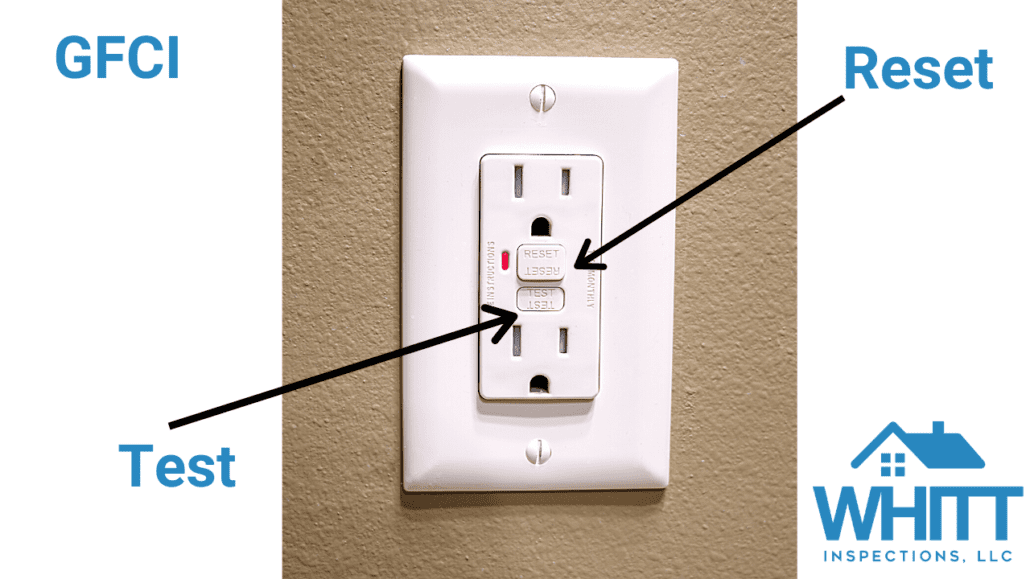
Step 2: Press the “Test” button. If you hear a clicking sound, this indicates the circuit has tripped, and the lamp or phone should turn off.
Step 3: Press the “Reset” button (it should have popped out when you hit “Test”). If the lamp or phone turns back on, then your GFCI protector is working just fine! If not, try these next steps:
NEXT: UNDERSTANDING, RECOGNIZING AND REMOVING CLOTH WIRING: YOUR COMPREHENSIVE GUIDE
What To Do When Ground Fault Circuit Interrupter Won’t Reset
If your GFCI button won’t push in, the solution may be as simple as pushing it harder to reach the unit. If still it doesn’t reset, there may be another GFCI on the same circuit keeping you from being able to reset it.
More than one on a circuit can sometimes be finicky. So go ahead and trip that second one, and then try to reset the first one.
Lastly, head to the service panel to see if you need to reset the circuit breaker. If all else fails, you probably either have a faulty GFCI or even a true ground-fault condition. In this case, further repairs are needed so you should call a qualified electrician.