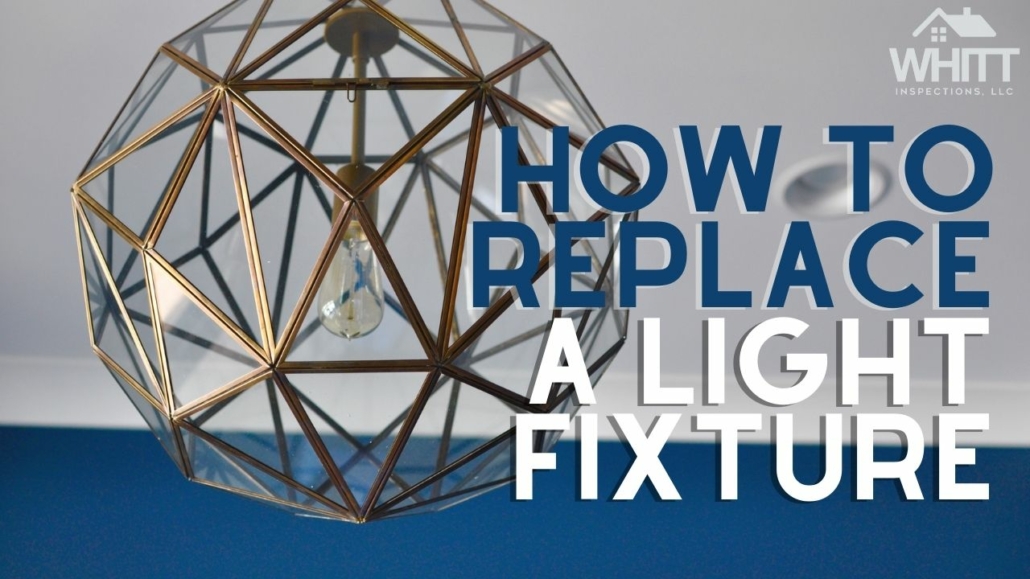
How To Change or Replace a Light Fixture in Your Home
Since we were kids, we’ve been warned about the dangers of messing around with electrical outlets. So if you’re having some reservations about how to replace a light fixture, rest assured, it’s not just you!
There are plenty of reasons why you may need to install a new light in your house. Maybe you’re taking up an interior design project. Or maybe you don’t get enough light in a certain room in your house.
Whatever the case may be, the first thing you need to do is make sure you have the right tools and the right instructions on how to install a light fixture.
A word of caution: Some areas require permits to even replace a light fixture. So make sure you are aware of the rules in your area, prior to attempting any light fixture replacement project.
RELATED: IS YOUR HOME FIRE SAFE?
How To Replace a Light Fixture In 4 Easy Steps
The good news is that the steps for replacing almost any light fixture are universal. Even though your new light will come with its own instructions, the same process can be copied no matter where you’re replacing a light in your home.
Expect ceiling fans— those are a different story.
So use this as your official guide for how to install a ceiling light!
What You’ll Need:
- Screwdriver
- New light fixture
- Screws and Wire Connectors (these typically come with your new light)
- Ladder
- Wire Stripper (maybe)
RELATED: WHAT YOU NEED TO KNOW ABOUT GALVANIZED PIPES
Step 1: Turn Off The Lights
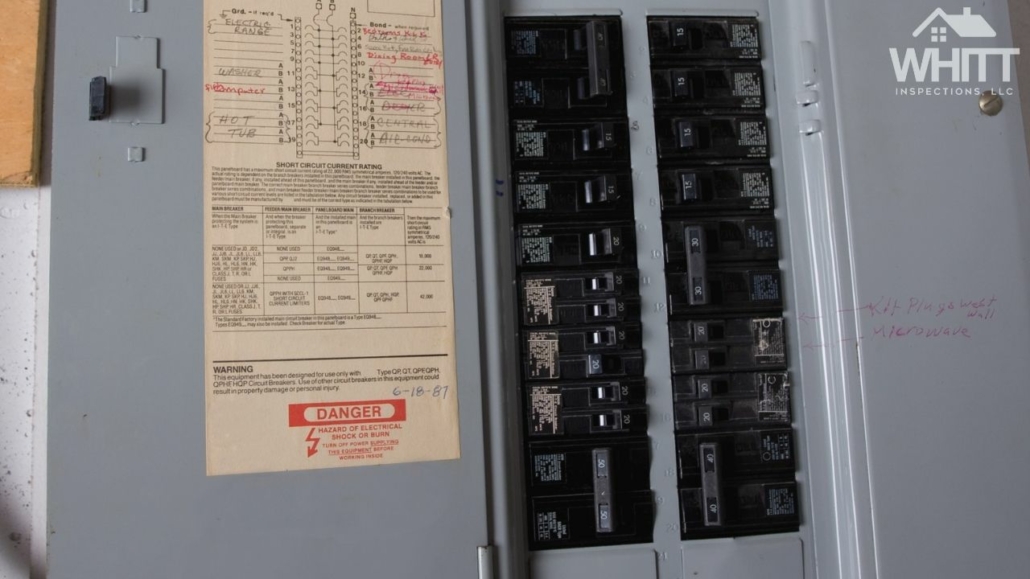
No— not just the light switch. For optimal safety, we recommend going to your circuit breaker and turning off the electricity right from the source.
This can turn into a duo project, too. If your circuit breaker isn’t labeled, this is the perfect time to get that done. Just turn on the lights in your house and turn off one breaker at a time. This helps you to see which breaker turns off which lights.
As you go through, make sure to properly label them for each room. Packing tape and a magic marker work perfectly for now.
Once you find the breaker for the room you want to replace a light fixture, flip it off. Make sure to turn off the light switch in the room, too!
Step 2: Unscrew The Old Light
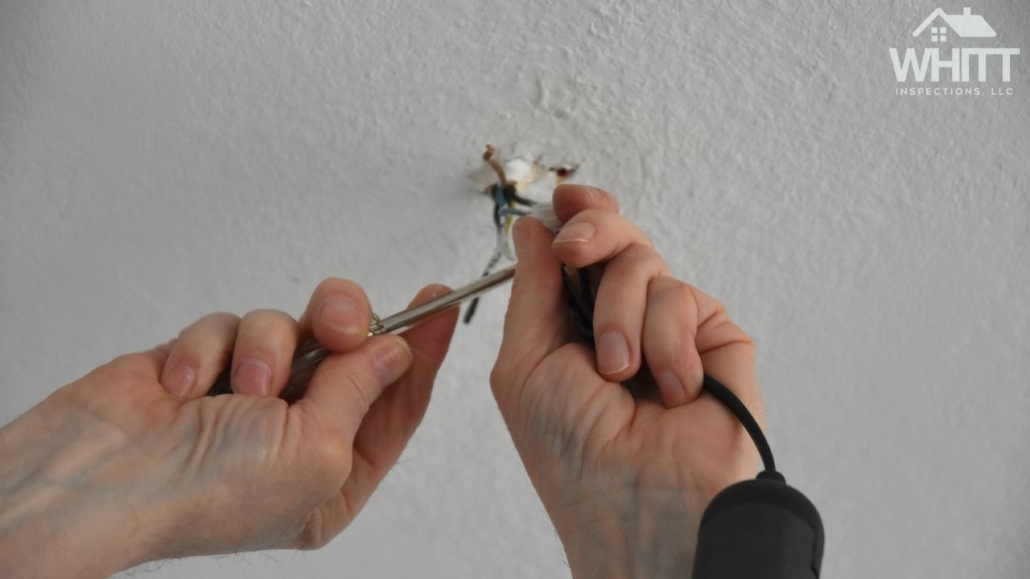
A word of advice: if you’re replacing a ceiling light, your ladder needs to be tall enough. Working from underneath the light won’t work. You’ll need to be able to see inside the ceiling where it’s attached.
Once you’re up there, grasp the ceiling light with your palm to keep it steady. As you begin to unscrew the light, you’ll notice it will still be attached by only the wires.
Pro-Tip: To make your life easier, you may want to wear some type of utility belt so you can easily throw the screws somewhere so that your hands are free.
Your light may also be attached to the ceiling with caulk. If that’s the case, use your screwdriver or a utility knife to pry the material away from the ceiling.
Now that you can see inside the electrical box, remove the connectors and untwist the wires. You can do this by hand. There may also be a screw attaching the light to the metal bracket. You’ll need to remove that with your screwdriver.
Sometimes when you replace a light fixture, the one you purchased will come with a new bracket. We recommend using that to make sure your new light fits properly. Your fixture’s instructions will have more details on the bracket.
It should be as simple as switching the old bracket, popping the new one in its place, and securing it with the provided screws.
Hanging a Chandelier
If you’re hanging something like a chandelier, make sure you measure how low you want it to hang first!
Here’s a great tip from the Wolberg Blog:
“A handy rule of thumb is that a chandelier should be 12 inches narrower than a table and have at least 48 inches of space from each of the room walls or edges. Hang a chandelier approximately 30 to 34 inches over a table with an 8-foot ceiling height.”
Some chandeliers can be heavy, so if it feels cumbersome consider making it a 2-person job.
RELATED: FLORIDA HOME MAINTENANCE CHECKLIST
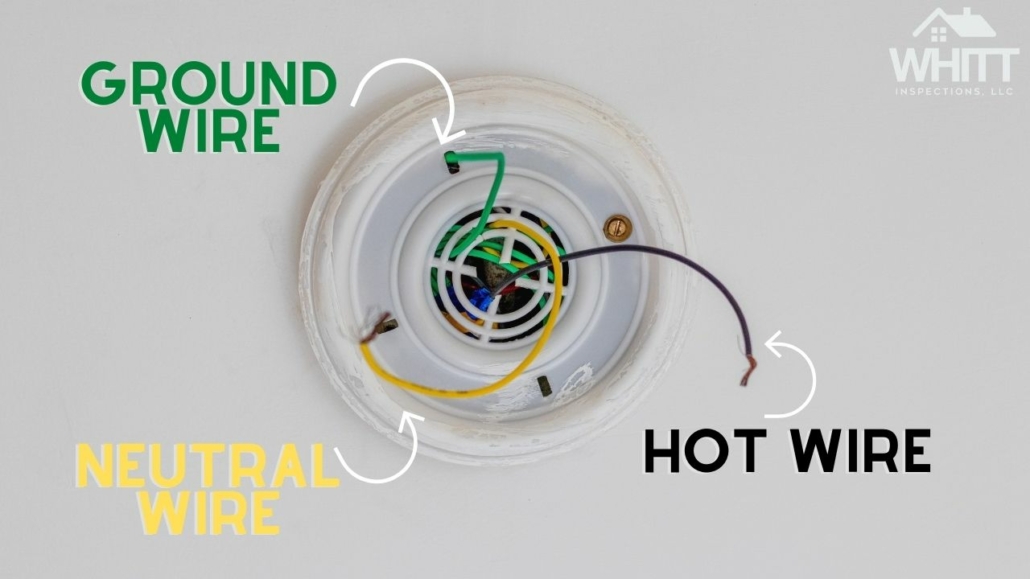
Step 3: Connect the Wires— Properly
This is the part that freaks some people out.
As we mentioned, no matter what type of light you buy or where you buy it (Home Depot, Amazon, or Wal-Mart), the instructions are going to be the same.
Still, you should read the light manufacturer’s instructions first. On the off chance that you didn’t get them (or you lost them), here’s what they probably said:
- Twist the black (hot) wire to the black wire in the electric box.
- Connect the white (neutral) wire to the white wire in the electric box.
- Twist the green/copper (ground) wire to the green/copper wire in the electric box.
You can learn more about the difference between hot, ground, and neutral wires here.
Your new wires may look frayed on the ends. This is okay, but just make sure they aren’t broken or you may have to make a new cut. From there, you just need to twist the wire to the ceiling wires and use the wire “nut” or connector to secure them in place.
Nowadays, you can depend on light manufactures to have the appropriate amount of the wire insulation (the black, white, and green/copper casings) stripped. However, if there’s not half an inch of exposed wire coming from your wires, then you’ll need to shave off some of the insulation with wire strippers. Check out the video below to see how to properly strip a wire.
NOTE: If you don’t see a green or bare copper wire coming from the ceiling, then you will usually have a metal box and see a green “grounding” screw. Be sure to wrap the green/copper wire on your new light under that green screw and tighten it. Bend the end of the grounding wire slightly into a “Shepard’s hook,” then place it under the screw, and use your screwdriver to seal it tight. The correct way to do this is make sure the direction of the wire under the screw will be in the same direction as how the screw turns, so it will tighten the wire in place as you turn the screw tighter.
Step 4: Close Up and Test It Out!

Now you’re going to gently fold the wires back into the ceiling canopy and screw the new light fixture into the bracket. You may also have a decorative nut for the outside of the light that needs to be screwed on for the finishing touch.
Then, just add in your light bulb of choice and any other potential light décor (such as a light chain), and voila— you have successfully replaced a light fixture!
Go back to your breaker box and turn the circuit breaker back on. Then you can flip on the light switch and watch your handy work come to light (everybody loves a good pun, right?).
RELATED: UNDERSTANDING, RECOGNIZING AND REMOVING CLOTH WIRING: YOUR COMPREHENSIVE GUIDE
Conclusion
We hope this helps all new (and old) homeowners easily replace a light fixture! Always be careful when you’re dealing with electrical units. If you never got a home inspection (or it’s been a few years) there’s no telling what
Speaking of home inspections… is it time for yours? Contact us for a quote!
NEXT: CUT ATTIC TRUSSES 101


Leave a Reply
Want to join the discussion?Feel free to contribute!